Windows environment
Standard setup
To install the Arx One Backup agent on a Windows system, download the application from https://get.arx.one/backup
Once downloaded, install the agent on the target system. Only the credentials are required to install the backup agent.
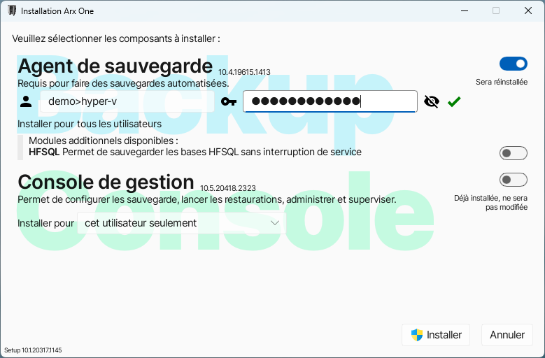
- Account : account used for backup and restore operations. If it's a root account, just type it as it is. If it is a secondary account, enter its full name using the following form: rootAccount-childAccount
- Password : Your password. Make sur to keep it.
Installation can only start when your credentials has been validated and the dot is green. If it is displayed in red, your credentials are incorrect.
Update
The agent update is automatic and relies on the Windows Task Scheduler.
To perform a manual update, there is two options:
- Manually run the scheduled task "Arx One updater"
- Launch the specifically provided backup agent's setup. If a backup agent is already installed on a machine, executing a new setup acts as a simple update, without entering credentials.
Automatic deployment
Syntax
The backup agent can be deployed automatically by using the following parameters :
--install=backup[/«version»]mandatory, version number is optional--silentfor a silent (invisible) install--account=«value»provide account to be configured with this agent (may contain environment variables, see below)--password=«value»provide a password--create-with-token=«value»when provided, the account is created during setup--override-accountallows to override account (using--accountorcreate-with-token) when agent is already configured with an account--channel=stable|testing|unstablefor the ones who dare
A few examples
Simple setup :
"Arx One Setup.exe" --install=backup --account=mon-compte --password=1234
Silent setup, specific version :
"Arx One Setup.exe" --install=backup/10.2.18709.1810 --silent --account=mon-compte --password=1234
Silent setup, with account creation :
"Arx One Setup.exe" --install=backup/10.2.18709.1810 --silent --account=compte-%computername% --create-with-token=eyJ0eXAiOiJKV1QiLCJhbGciOiJSUzEw…
Remarks :
- The created account is named after computer (due to
%computername%) - The provided token must be created with
Administration.CreateAccountauthorization (in read / write) in order that account is created